Swatching and Gauge, Part II: How to Swatch
In the first part of this series I explained why you really do need to swatch and check gauge if you want your hand knits to fit--and why would you spend all that time knitting something that doesn't fit? Today we're going to look at how to swatch. Swatching correctly can help ensure that you don't end up with a lying liar swatch, the bane of the hand knitter's existence.
Swatching for Hand Knitting
Before you start your swatch, you need to locate the gauge information in the pattern you're using. In most patterns, that information looks something like this: '20 sts and 24 rows = 4" in st st, blocked.' A small snippet, but it actually contains a lot of important information! In addition to the crucial information about stitches and rows per inch, it also tells you that your swatch should be knit in stockinette and that you need to block your swatch before measuring.
Why Four Inches?
Let's start with the obvious question: if the pattern is based on the number of stitches per inch, why is the gauge given over 4 inches? Because knitting and measuring at least 4 inches of fabric gives you less room for error. If you were to measure a single inch, you might miss a teeny fraction of a stitch that would actually impact the final measurement of you garment (you probably wouldn't even notice a quarter of a stitch in 1", but that adds up to an entire extra stitch over 4"). You also likely don't knit every stitch with the exact same tension, so a single inch is not a true reflection of your average gauge over a large swath of fabric. A larger swatch also gives you the opportunity to see how the knitted fabric behaves at that gauge--is it fluid and drapey, or stiff and rigid? A single inch of fabric won't show those qualities as clearly.
Knit Your Swatch
Now, don't be fooled by the gauge numbers--you absolutely, positively should NOT just cast on 20 stitch, knit 24 rows and call it a day. The resulting stockinette square will curl inward, even after blocking, making it impossible to measure correctly. In addition, your edge stitches will be looser than the rest of your stitches, further impeding an accurate measurement.
In order to measure 4 full inches, you actually need to knit a bit more. I know, I know! But I promise, it's worth it. So, start with the number of stitches for gauge, 20, and add a few more. And then, a few more. I would tack on enough extra stitches to make the stockinette portion of your swatch at least 5" wide, plus a few more stitches for a border on either side.
When you begin your swatch, start with a couple of rows of garter stitch. This gives you firm edge so you can more accurately measure the stockinette portion. When you're ready to start the stockinette part, I also recommend working a few stitches of garter stitch on either side. This will help prevent curling and clearly frame the stockinette part for better measuring. Knit your swatch to at least as many rows as called for in the gauge instructions (watch a couple innings of a baseball game, a Friends rerun, Dancing with the Marriage Boot Camp Housewives of Atlanta, whatever) and finish off with a couple more rows of garter stitch. Bind off and you're done! That wasn't so bad, was it?

The next step is to treat your swatch the way you would treat your finished garment. Your first move is to give your swatch a little bath, then lay it flat to dry. You do not need to pin it out and block it vigorously unless you expect to do the same with your finished object! If you're swatching something lacy, yes, go ahead and give it a good blocking. If you're swatching for a mostly stockinette sweater, just smooth your swatch out so the stitches are even and it's a nice square shape, and let it dry--you might put a few pins in to keep the edges straight, but you don't want to stretch it within an inch of its life. That won't give you the information you need for knitting your sweater.
Once your swatch is dry, go ahead and measure--on a flat surface, use a measuring tape to mark off 4" and count your stitches. If you get gauge and you're happy with the fabric, you're ready to start knitting! If not, well, back to the drawing board--if you have too many stitches over 4", go up a needle size and swatch again; if you have too few stitches, down a needle size.
Swatching in the Round
If the item you're working on is knit in the round, your swatch should also be knit in the round. Why? Because your knits and your purls aren't the same size. When you work stockinette in the round, you knit every stitch; when you work it flat, you knit the right side and purl the wrong side. So your gauge is different.
This is where things get a little tricky. Chances are, you're knitting your round sweater, for example, on a long circular needle, but if you use that same needle to swatch, your swatch would have a very large diameter--that's a lot of extra knitting. So you might opt to swatch a small tube on DPNs--but many knitters find they have a different gauge when working on DPNs. (I always feel like my needles are about to slip away, so I knit extra tightly.) If that's the case, the information you're getting from your swatch won't translate to your sweater. What to do?
I recommend swatching flat in the round.
What?
Using that needle you plan to use for your item, begin your swatch as normal--but at the end of the row, instead of turning your work, slide the stitches back to the other end of the needle, and loosely strand your working yarn behind the swatch, bringing it to the start of the row to knit again. This method will give you the same gauge as knitting in the round because you're knitting every stitch--no purling. But your swatch remains flat, with a bunch of loose strands behind it, like this:
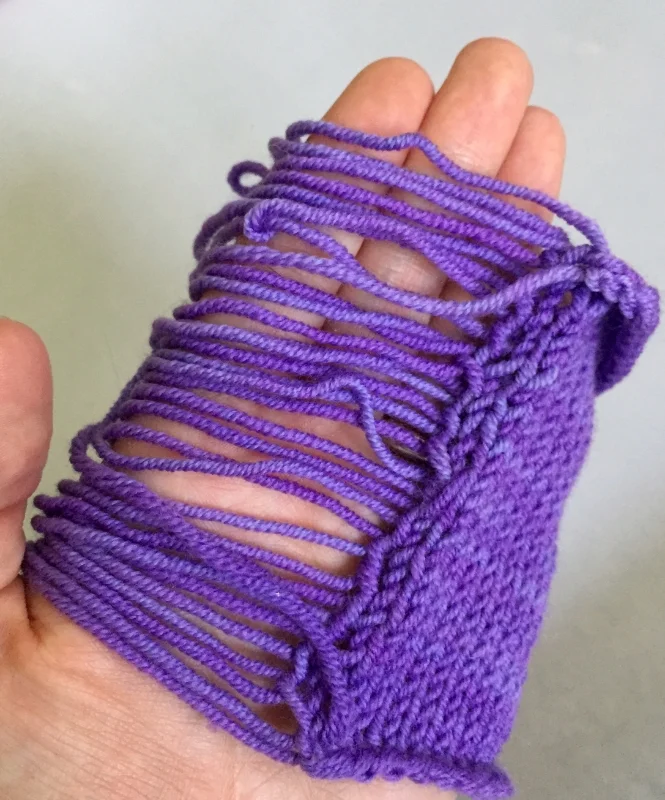
After you bind off, snip all those loose strands right through the middle and your swatch will lie flat, for easy measuring. Proceed as for a regular flat swatch (using this method, your edge stitches will be quite loose, so it's even more important to make a swatch large enough that you won't be including those edge stitches in your 4" measurement).
Tip and Tricks
Remembering your needle size: How many times have you knit a swatch only to come back to it later and find you've forgotten the needle size you used? Work the needle size into your swatch by adding that number of eyelets or purl bumps in the middle of the stockinette. Easy to see, no need to remember anything.
Make measuring easier: You may find it help to mark off the 4" square where you're going to count your stitches by weaving a strand of contrast color yarn vertically through the swatch on either side (and horizontally top and bottom, if you like).
Swatch growth: Measure the length of your swatch before washing and blocking, and again after. Did it grow? Many yarns do. This is important to remember when working on your project. If the instructions say to knit some portion of the garment to a particular length, knit yours a bit shorter with the knowledge that it will grow.
Reference library: For a yarn you use (or plan to use) frequently, knit several swatches with your regular needles in the most common needle sizes for that weight (ex: worsted weight, needles size US 7-9) and save them for reference. No need to reinvent the wheel.
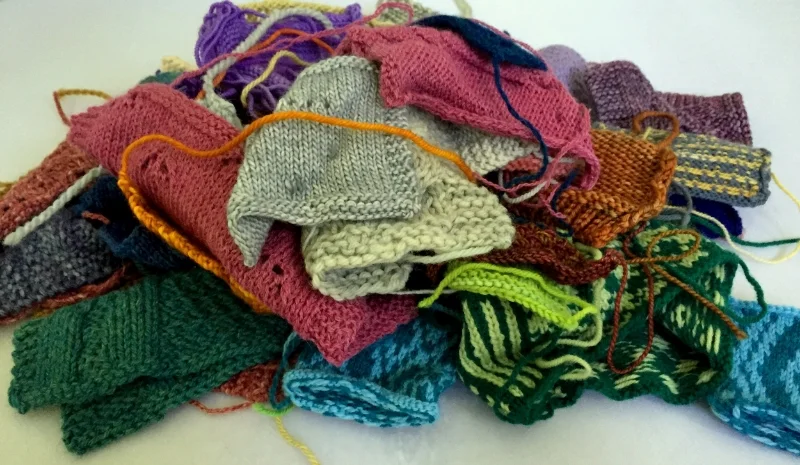
What to do with swatches: After years of knitting, you accumulate a lot of seemingly useless squares of fabric. Don't let them sit around taking up space! Use them as coasters or trivets, keep a few in your car to clean up messes, sew them into a blanket. Sew up the side and use as a mug or beer bottle cozy. Anytime you swatch for colorwork, do it in the round (for real, not flat) and add a vertical stripe panel that you can later use to practicing steeking. Kids like weird things as toys, give them some swatches to play with. Use them as blankies for stuffed animals and dolls. Or how about this knit bunny from a square? Get creative!
So, now we've covered why you need to swatch and how to swatch. In the final part of this series I'll talk about lying liar swatches and how to avoid them, plus what to do if you just can't get gauge! Stay tuned.
If you enjoyed this post, you may also like . . .